
The Ultimate Guide: How to Replace a Window Pane Like a Pro
Last Updated: June 2025 | Reading Time: 12 minutes
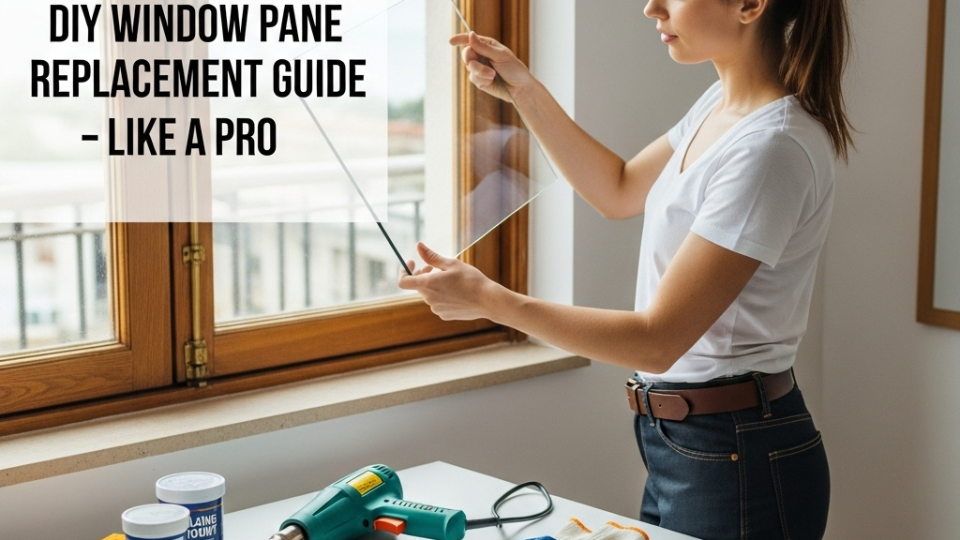
Whether you’re dealing with a baseball through the living room window or years of wear and tear, learning how to replace a window pane is a valuable skill that can save you hundreds of dollars. This comprehensive guide will walk you through every step of DIY window pane replacement, from deciding whether to tackle the project yourself to achieving professional-quality results.

I. The “Should I DIY This?” Decision-Making Hub
Interactive Self-Assessment Quiz
Before diving into how to fix a broken window, ask yourself these critical questions:
✓ Skill Level Assessment:
- Have you completed basic home improvement projects before?
- Are you comfortable working with glass and sharp tools?
- Do you have 4-6 hours to dedicate to this project?
- Is the window easily accessible (ground floor, no ladders required)?
✓ Window Condition Check:
- Is only the glass broken, or is the window frame damaged?
- Is this a single-pane window (easier) or double-pane (more complex)?
- Are you dealing with a standard rectangular pane or decorative glass?
When to Call a Pro
While DIY window pane replacement is manageable for many homeowners, certain situations require professional expertise:
| Call a Professional When: | Why It Matters |
|---|---|
| Multi-story windows requiring ladders | Safety risk and potential fall hazards |
| Suspected lead-based paint (pre-1978 homes) | Health hazards require specialized handling |
| Structural frame damage | May indicate bigger issues requiring assessment |
| Double or triple-pane sealed units | Specialized tools and techniques needed |
| Historic or custom windows | Preservation requires expert knowledge |
| Multiple broken panes | Cost-effectiveness of professional bulk work |
DIY vs. Professional Cost Breakdown
DIY Window Pane Replacement Costs:
- Glass pane: $20-80 (depending on size)
- Glazing compound: $15-25
- Basic tools (if needed): $50-100
- Total DIY Cost: $85-205
Professional Replacement Costs:
- Labor: $100-200 per window
- Materials: $30-100
- Total Professional Cost: $130-300
For Gibraltar residents: Factor in local material costs and availability when making your decision.

II. The “Ultimate” Tool and Materials Guide
Essential Tools
| Tool | Purpose | Pro Tip |
|---|---|---|
| Putty Knife (1.5-2 inches) | Removing old glazing compound | Look for a flexible blade for better control when applying new glazing putty |
| Heat Gun | Softening old putty for removal | Use on low setting to avoid cracking surrounding glass. Keep it moving to distribute heat evenly |
| Glass Cutter | Scoring glass if trimming needed | Oil the wheel regularly for clean cuts |
| Pliers | Removing glazier’s points | Needle-nose pliers work best for precision |
| Chisel (1/2 inch) | Stubborn putty removal | Keep sharp for clean cuts |
Safety Gear (Non-Negotiable!)
- Safety glasses – Protect against glass shards
- Work gloves – Cut-resistant preferred
- Dust mask – Essential when removing old putty
- Closed-toe shoes – Never work barefoot around glass
Materials Needed
For Wood Windows:
- Replacement glass (measured to fit)
- Glazing compound (oil-based for durability)
- Glazier’s points (metal triangles)
- Primer and paint for finishing
For Vinyl Windows:
- Replacement glass
- Glazing tape or sealant
- Replacement vinyl stops (if damaged)
“Good to Have” Items
- Nail set – For driving glazier’s points flush
- Razor blade scraper – Final cleanup of old putty
- Drop cloths – Protect flooring and furniture
- Cardboard – Template for measuring glass
III. Pre-Replacement Essentials: Measuring and Preparation
How to Accurately Measure for Replacement Glass
Critical Measurement Steps:
- Measure the opening, not the broken glass
- Take measurements at multiple points (top, middle, bottom for height; left, middle, right for width)
- Use the smallest measurement to ensure proper fit
- Subtract 1/8 inch from each dimension for necessary clearance
Example: If your opening measures 18 1/4" x 12 1/8"
Order glass: 18 1/8" x 12"
Different Window Types:
| Window Type | Measurement Notes |
|---|---|
| Single-hung | Measure to the rabbet (glass groove) |
| Double-hung | Each sash measured separately |
| Casement | Account for hardware clearance |
| Fixed pane | Straightforward opening measurement |
Prepping Your Workspace Checklist
Before You Begin:
- [ ] Lay down drop cloths in work area
- [ ] Set up a sturdy container for broken glass
- [ ] Ensure proper ventilation (especially when using heat gun)
- [ ] Have a vacuum ready for final cleanup
- [ ] Clear the area of pets and children
- [ ] Check weather conditions (avoid windy days)
IV. The Step-by-Step Replacement Process
Step 1: Removing the Broken Glass and Old Putty
For Shattered Glass:
- Tape over cracks to prevent further shattering
- Work from outside if possible
- Remove large pieces first, then smaller shards
- Use pliers for stubborn pieces in the frame
For Cracked but Intact Glass:
- Score along the crack with a glass cutter
- Apply gentle pressure to separate pieces
- Remove carefully to avoid frame damage
Putty Removal Methods:
| Method | Best For | Process |
|---|---|---|
| Heat Gun Method | Most old putty | Heat in sections, scrape while warm |
| Chemical Stripper | Rock-hard putty | Apply, wait, scrape when soft |
| Manual Scraping | Recently applied putty | Use sharp putty knife at 45-degree angle |
Step 2: Preparing the Window Frame
Wood Frame Preparation:
- Clean the rabbet thoroughly – Remove all old putty and debris
- Light sanding – 120-grit sandpaper for smooth surface
- Apply wood conditioner – Prevents glazing compound from drying too quickly
- Prime bare wood – Essential for proper adhesion
Vinyl Frame Preparation:
- Clean with mild detergent – Remove dirt and old sealant
- Inspect vinyl stops – Replace if cracked or damaged
- Check for warping – Ensure frame is square
Step 3: Installing the New Pane
Wood Windows – Traditional Glazing Method:
- Apply glazing compound bed – Thin layer in rabbet
- Set the glass – Press gently into compound
- Install glazier’s points – Every 6-8 inches around perimeter
- Check for square – Measure diagonals to ensure proper fit
Pro Tip: Handle glass by the edges only. Clean fingerprints immediately with glass cleaner to avoid permanent marks.
Vinyl Windows – Stop Method:
- Remove vinyl stops – Carefully pry out with putty knife
- Set glass in frame – Rest on setting blocks if provided
- Apply glazing tape – Create weatherproof seal
- Reinstall vinyl stops – Snap firmly into place
Step 4: Applying the Final Glazing/Sealing
Professional Glazing Technique:
- Apply compound generously – Better too much than too little
- Tool with putty knife – 45-degree angle for smooth finish
- Create triangular profile – Allows water runoff
- Trim excess cleanly – Use sharp blade for clean lines
Quality Check Points:
- [ ] No gaps between glass and putty
- [ ] Smooth, consistent profile
- [ ] Proper slope for water drainage
- [ ] Clean glass surface
Step 5: Curing and Finishing
Curing Timeline:
- Initial set: 24-48 hours
- Paint-ready: 7-14 days (depending on weather)
- Full cure: 30 days
Painting Tips:
- Use high-quality primer – Bonds to glazing compound
- Apply thin coats – Multiple thin coats better than one thick coat
- Overlap onto glass – 1/16 inch for weather seal
- Use angled brush – For precise lines
V. Advanced Troubleshooting and Common Mistakes
“What If…” Scenarios
What if the frame gets damaged during putty removal?
- Minor nicks: Fill with wood filler, sand smooth
- Deeper gouges: May need professional repair
- Rotted sections: Replace damaged wood before proceeding
What if the new glass is slightly too big?
- Glass cutter method: Score and break carefully
- Professional cutting: Safer for expensive glass
- Return to supplier: Most will recut for free
What if the old putty is rock hard?
- Heat gun on higher setting – Be careful not to crack glass
- Chemical stripper: Allow longer dwell time
- Multi-tool with scraper: For stubborn sections
Top 3 Mistakes to Avoid
| Mistake | Why It Happens | How to Avoid |
|---|---|---|
| Incorrect measurements | Measuring broken glass instead of opening | Always measure the frame opening |
| Poor frame preparation | Rushing to install new glass | Clean thoroughly, prime bare wood |
| Improper glazing application | Inexperience with compound consistency | Practice on scrap wood first |
VI. The Ultimate FAQ Section ‘ How to Replace a Window Pane ‘
Common Questions About Window Pane Replacement
Q: Can I replace just one pane in a double-pane window? A: While technically possible, it’s not recommended. Double-pane windows are sealed units, and breaking the seal compromises their energy efficiency. Consider full window replacement.
Q: How long does it take to replace a window pane? A: For a standard single-pane window, expect 2-4 hours for removal, installation, and cleanup. Add extra time for glazing compound to cure before painting.
Q: What is the average cost to replace a window pane? A: DIY costs range from $85-205, while professional installation runs $130-300. Gibraltar residents may find slightly higher material costs due to location.
Q: Is it cheaper to replace the glass or the whole window? A: For single-pane windows in good condition, glass replacement is significantly cheaper. For double-pane units or damaged frames, full window replacement may be more cost-effective.
Q: How do I know if my window has lead paint? A: Homes built before 1978 likely contain lead paint. Test kits are available, or hire a certified professional for assessment.
Q: Can I do this project in winter? A: Possible but challenging. Glazing compound performs best in temperatures above 50°F. Plan for indoor curing if necessary.
Q: What’s the lifespan of a properly replaced window pane? A: With quality materials and proper installation, a replaced window pane should last 20-30 years with regular maintenance.
Final Thoughts
Learning how to replace a window pane is a rewarding DIY skill that saves money and gives you confidence in home maintenance. Whether you’re in Gibraltar dealing with coastal weather or anywhere else facing broken glass, following this comprehensive guide ensures professional-quality results.
Remember: take your time, prioritize safety, and don’t hesitate to call a professional if you encounter unexpected complications. Your windows are crucial for home security, energy efficiency, and comfort – they deserve proper care and attention.
Ready to start your window pane replacement project? Gather your tools, measure twice, and take pride in mastering this essential home improvement skill.
Have questions about your specific window replacement project? Feel free to reach out to local professionals in Gibraltar for personalized advice and assistance with complex installations.
Our branches in the United States
Our branches in the world
Get Your Free Window Repair Estimate Today!
Don’t let window damage compromise your home’s comfort and efficiency.
Contact Windows and Doors Repair LLC
(+350) 056021155
✉️ contact@windowsrepairgib.com

